
Vegetable Garden for Beginners: 7 Steps to Start From Scratch
Starting a vegetable garden from scratch may feel overwhelming at first, but it becomes much easier when you take it step by step. You do not need a large yard or expert skills to grow fresh food at home. With the right garden planning, healthy soil preparation, proper sunlight, and a few beginner-friendly vegetables, you can build a garden that grows stronger each season. This guide will walk you through the basics in a simple, real-life way, from choosing the best spot to planting your first seeds. Whether you have a backyard, raised bed, or small space, your home vegetable garden can start with confidence.
This guide walks you through every step, from choosing the right spot to harvesting your first basket of vegetables. No fluff, no filler. Just practical advice built on real experience.
Read our complete Vegetable Gardening guide.
Step 1 — Find the Right Location for Your Garden Bed
Before you spend a single dollar on seeds or soil, walk around your yard at different times of day and watch where the sun falls. This is the single most important factor beginners skip, and it causes more first-year failures than anything else.
Most vegetables need a full sun garden location — that means at least six to eight hours of direct sunlight per day. Tomatoes, cucumbers, zucchini, peppers, and green beans are sun hogs. They will sulk and underperform in shade. Leafy vegetables like lettuce, spinach, and kale are more flexible and can handle partial shade, which makes them great for spots that get morning sun but shade out by early afternoon.
🌞 Pro Tip
Use the free app Sun Seeker (available on iOS and Android) to simulate sun paths across your yard through different seasons. It is remarkably accurate and saves a lot of guesswork, especially in urban yards surrounded by buildings or tall trees.
Also consider what is nearby. A spot close to a garden hose makes your watering routine dramatically less annoying. Wind exposure matters too. Young seedlings and tall plants like tomatoes and peas need some protection from strong afternoon winds. A fence line or a garden wall on the west side works beautifully as natural wind protection for the bed.
If your yard gets no reliable full sun anywhere, do not give up. A balcony vegetable garden or patio container garden with grow bags and large pots can work wonders. I know a woman in Columbus who grows more than 30 pounds of food per season from a south-facing apartment balcony. Containers are not a consolation prize. They are a legitimate strategy.
Step 2 — Decide Between In-Ground, Raised Bed, or Containers
This choice shapes your cost, effort, and long-term flexibility. Each option has a real place depending on your situation.
In-Ground Garden Bed
An in-ground garden bed is the classic approach. You work with your existing soil, which saves money upfront. The downside is that native soil in many American yards is compacted clay or nutrient-poor sand — neither of which vegetables love. You will need to invest time in garden bed preparation and soil drainage improvement before you can grow much of anything. If you are dealing with clay-heavy soil, building raised beds on top of it is often a smarter long-term move.
Raised Bed Vegetable Garden
A raised bed vegetable garden is the approach I recommend to almost every beginner. You fill a contained frame with a custom raised bed soil mix, which means you start with perfect growing conditions right away. Weeds are easier to manage, drainage is better, and the soil warms up faster in spring — giving you a longer growing season.
A standard 4-by-8-foot raised garden bed kit from a hardware store costs around $80 to $150 and is a worthwhile investment that lasts for years. Before buying soil, use the Raised Bed Soil Calculator to get an exact bag count for your bed dimensions so you do not run short mid-fill. For more read How Much Soil Do You Need for a 4×8 Raised Bed?
Container Vegetable Garden
For renters, apartment dwellers, or anyone with minimal outdoor space, containers are the answer. Use large 5-gallon or 10-gallon pots for tomatoes and peppers. Shallow containers work well for lettuce, radishes, and spinach. Fill them with a quality potting mix for vegetables — never regular garden soil, which compacts badly in containers and suffocates roots over time.
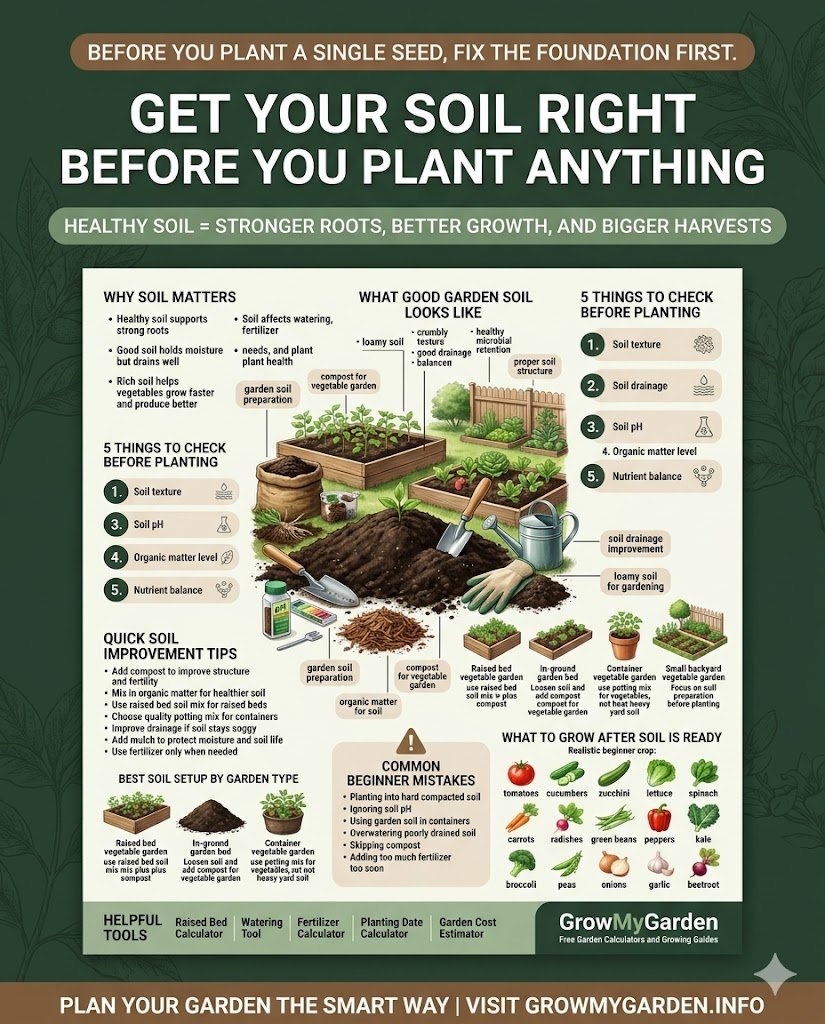
Step 3 — Get Your Soil Right Before You Plant Anything
Healthy soil is the engine that runs your entire garden. Gardeners who skip this step are essentially planting vegetables in sand and hoping for rain. The results are always disappointing.
Start by testing soil quality. A basic pH test kit from a garden center costs about five dollars. Most vegetables prefer a soil pH between 6.0 and 7.0 — slightly acidic to neutral. If your soil is too acidic, lime helps bring it up. If it runs too alkaline, sulfur or added organic matter can bring it down. The app SoilWeb can also give you a rough idea of your region’s native soil type based on GPS data before you even dig a shovel in.
For garden soil preparation, the goal is to create what gardeners call loamy soil — that magical mix that holds moisture without waterlogging and crumbles easily in your hand. To get there:
1 Add generous amounts of compost
Compost is the single best amendment for nearly any soil type. It adds organic matter, feeds beneficial soil microbes, and improves both drainage and water retention. Work in a 3 to 4-inch layer of compost for vegetable garden use, turning it into the top 10 to 12 inches of soil. Homemade compost is ideal, but bagged options from brands like Black Gold or Coast of Maine work well too.
2 Loosen and aerate compacted ground
Use a garden fork to break up hard, compacted ground at least 12 inches deep. This allows roots to penetrate freely and water to drain properly rather than pooling on the surface. For new beds, the no-dig gardening method — layering cardboard, compost, and topsoil — is an efficient alternative that skips the hard physical labor entirely.
3 Add a slow-release fertilizer at planting time
Mix in a granular, balanced fertilizer for vegetables like a 10-10-10 formulation when preparing your bed. This gives plants steady nutrition during the early weeks without the risk of fertilizer burn that comes with strong liquid feeds applied too liberally.
⚠️ Common Beginner Mistake
Do not use fresh manure directly in a vegetable garden. It can burn plants and harbor bacteria. Always use aged or composted manure, which has had time to break down safely. The smell difference alone will confirm you have the right stuff.
Step 4 — Choose the Right Vegetables for Your First Season
When I ask new gardeners what they want to grow, the answer is usually “everything.” That impulse is completely understandable, but it is also a fast track to overwhelm. Start with a focused selection of reliable producers that fit your climate and your cooking habits.
Here are the vegetables I consider genuinely beginner-friendly in American gardens:
🍅
Tomatoes
High reward, any zone
🥬
Lettuce
Fast and forgiving
🥒
Cucumbers
Vigorous growers
🫛
Green Beans
Low maintenance
🌿
Spinach
Cool season star
🥕
Carrots
Kids love them
🌱
Radishes
Ready in 25 days
🫑
Peppers
Warm season only
🥦
Kale
Hardy and productive
🧅
Onions
Easy from sets
🥗
Zucchini
Borderline invasive
🟣
Beetroot
Leaf and root both edible
If you are in the Pacific Northwest or upper Midwest, lean heavily into cool season vegetables like spinach, peas, lettuce, kale, and broccoli. They thrive in cooler spring and fall temperatures and tend to bolt — go to seed and turn bitter — once real summer heat arrives. In the South, Southwest, or Southeast, your long, hot summers are a gift for warm season vegetables like tomatoes, cucumbers, peppers, and green beans. You will want to plant them earlier in the year than northern gardeners typically assume.
Step 5 — Understand Planting Schedules and Frost Dates
One of the most practical things you can do as a beginner is look up your last frost date. This single date governs almost every planting decision you will make in spring. In Minneapolis, the average last frost date lands around May 15. In Atlanta, it is mid-March. In Phoenix, it falls as early as late January. These differences are enormous and they determine everything from when to sow seeds to when it is safe to move transplants outside.
The USDA Plant Hardiness Zone map divides the country into climate zones based on average minimum winter temperatures. Our Planting Date Calculator goes further than a basic frost date — enter your climate zone and it builds a full sowing, transplanting, and harvest schedule for every crop on your list. Bookmark it. Refer to it every spring before you touch a single seed packet.
| Vegetable | Season Type | When to Plant (Northern US) | Days to Harvest |
|---|---|---|---|
| Lettuce | Cool Season | 2 to 4 weeks before last frost | 45 to 60 days |
| Spinach | Cool Season | 4 to 6 weeks before last frost | 40 to 50 days |
| Radishes | Cool Season | 3 to 4 weeks before last frost | 22 to 30 days |
| Peas | Cool Season | 4 to 6 weeks before last frost | 60 to 70 days |
| Kale | Cool Season | 3 to 5 weeks before last frost | 55 to 75 days |
| Tomatoes | Warm Season | 2 weeks after last frost | 70 to 85 days |
| Cucumbers | Warm Season | 1 to 2 weeks after last frost | 50 to 65 days |
| Peppers | Warm Season | 2 to 3 weeks after last frost | 65 to 90 days |
| Zucchini | Warm Season | 1 to 2 weeks after last frost | 45 to 55 days |
| Green Beans | Warm Season | 1 to 2 weeks after last frost | 50 to 60 days |
Step 6 — Starting Seeds vs. Buying Transplants
Tomatoes and peppers take 8 to 10 weeks to grow from seed to transplant-ready size. Most beginner gardeners do not have that head start in spring, so purchasing transplants from a local nursery is a perfectly legitimate shortcut. For slow-growing vegetables like tomatoes, peppers, broccoli, and kale, I often recommend buying starts in the first year and focusing your seed-starting energy on the crops that are better off direct-sown anyway.
That said, starting seeds indoors opens up dramatically more variety options. Nurseries carry ten types of tomato. Seed catalogs carry hundreds. If you want to try Purple Cherokee heirlooms, a yellow pear tomato, or a no-name variety your neighbor swears by, you will need to grow from seed yourself.
For direct sowing in the garden — carrots, beans, radishes, beets, peas, and squash — you simply plant them straight into prepared soil. These vegetables do not like having their roots disturbed by transplanting, so they are always started outdoors. Pay close attention to the recommended planting depth for vegetables on the seed packet. As a rough rule, plant seeds two to three times as deep as their diameter. Tiny lettuce seeds barely need covering. Large bean seeds go an inch or more down.
Hardening Off Seedlings
If you start seeds indoors under grow lights and then plan to transplant them outside, you cannot simply move them from a cozy indoor shelf to a windy garden bed overnight. They will go into shock. The hardening off process involves placing them outside in a sheltered spot for a few hours per day over one to two weeks, gradually increasing their outdoor exposure. It feels a little fussy, but it makes a real and measurable difference in how well seedlings establish once they are in the ground.
💡 Gear Tip
A simple shop light fitted with a 4,000K LED bulb works surprisingly well for indoor seed starting. You do not need an expensive purpose-built grow light setup. Keep the light about 2 to 3 inches above seedlings and run it for 14 to 16 hours a day. A cheap plug-in timer handles the schedule automatically so you never forget to turn it off.
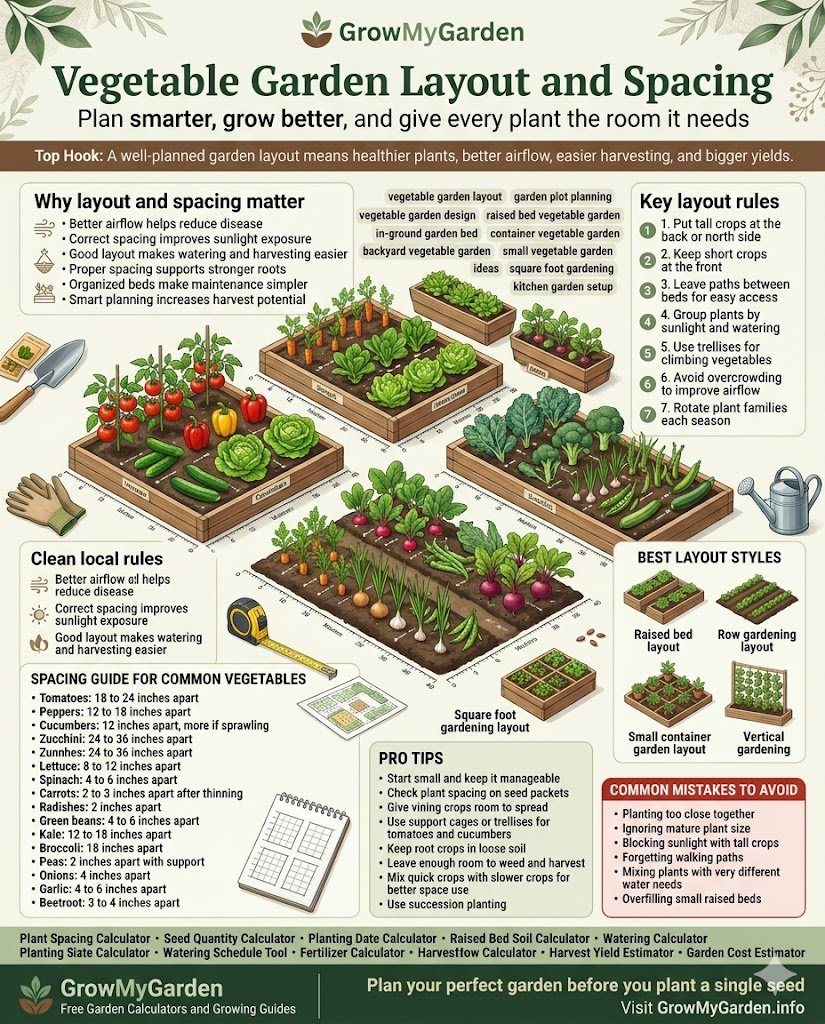
Step 7 — Vegetable Garden Layout and Spacing
Jamming plants too close together is one of the most common beginner errors, and it causes real problems. Crowded plants compete for water and nutrients, and poor airflow between them creates the humid conditions that fungal diseases love. Plant spacing requirements are printed on every seed packet and plant tag for a reason — follow them, at least in your first season.
A popular approach for small gardens is the square foot gardening method, originally developed by Mel Bartholomew. It divides a raised bed into one-foot squares and assigns each square a specific number of plants based on size. One tomato plant per square. Nine spinach plants per square. Sixteen radishes per square. It is a structured, efficient system that prevents accidental overcrowding without requiring any complicated math.
For any bed size and any crop, our Plant Spacing Calculator tells you exactly how many plants fit and how to arrange them — no grid drawing required.
Companion planting vegetables is another smart layout strategy worth learning early. Some plants actively help each other when grown in proximity. The classic example is the Three Sisters combination used by Native American farmers for centuries: corn, beans, and squash planted together. The corn provides a climbing structure for the beans, the beans fix nitrogen in the soil, and the broad squash leaves shade out weeds. Basil planted near tomatoes is said to improve flavor and deter certain pests. Marigolds near peppers and cucumbers repel aphids and nematodes. These relationships are real, not garden mythology.
Step 8 — Watering Your Vegetable Garden Properly
Most vegetables need about one inch of water per week, either from rain or irrigation. The deeper question is not how much water, but when and how to deliver it. To know exactly how much that translates to for your specific crops and bed size each week, the Watering Schedule Tool does the calculation for you automatically.
Watering deeply and infrequently is far better than shallow watering every single day. Deep watering trains roots to grow downward in search of moisture, which makes plants more drought-tolerant and resilient over time. Shallow daily watering keeps roots near the surface where they are vulnerable to heat and drying out quickly.
The best time to water is in the early morning. This allows leaves to dry out during the day, which reduces the risk of fungal diseases. Watering in the evening leaves foliage wet overnight — an open invitation for problems like powdery mildew and early blight, especially on tomatoes.
A drip irrigation system for your garden is the gold standard because it delivers water directly to the root zone with minimal waste and keeps foliage dry throughout the season. Entry-level drip systems from Rain Bird or DIG cost as little as $30 to $50 for a small raised bed and pay for themselves quickly in water savings and healthier plants. If you are sticking with a garden hose, use a soaker hose attachment and try to direct water at the base of plants rather than overhead.
Step 9 — Managing Weeds, Pests, and Diseases
A thriving vegetable garden attracts attention — from you, from birds, and unfortunately from every insect within flight distance. But pest management does not have to be a chemical arms race.
Keeping Weeds Under Control
Weeds are fastest and easiest to pull when they are small. Once they set seed, you are fighting that battle all over again the following year. Mulching your vegetable garden with a 2 to 3-inch layer of straw, shredded leaves, or wood chips dramatically suppresses weed growth while also conserving soil moisture and moderating soil temperature. It is one of the highest-return habits in gardening with very little ongoing effort required.
Dealing With Common Garden Pests
Aphids cluster on the undersides of leaves and quietly sap plant energy. A strong blast of water from a garden hose knocks most of them off, and neem oil applied in the evening handles persistent infestations without harming beneficial insects. Slugs love cool, damp conditions and do their damage overnight — check under boards, pots, and dense mulch, or use diatomaceous earth as a barrier around vulnerable seedlings.
Row covers made of lightweight fabric are one of the most effective forms of pest protection available because they create a physical barrier between your plants and insects like cabbage moths, squash vine borers, and cucumber beetles. They let in light and water while keeping pests out. Drape them over transplants early in the season and remove when flowering begins so pollinators can do their work.
Encouraging beneficial insects through planting flowers like dill, fennel, yarrow, and alyssum nearby brings in ladybugs, lacewings, and parasitic wasps that feed on garden pests naturally. These garden allies cost nothing once established and work around the clock without any effort from you.
Step 10 — Keeping Up Through the Season and Harvesting Well
The hardest part of vegetable gardening is not starting. It is maintaining consistent attention through the long middle stretch of summer when life gets busy and the garden starts looking a little wild.
Succession planting is a technique that spreads out your harvest by sowing short-season crops like lettuce, radishes, and spinach in small batches every two to three weeks. This way you always have something ready to pick rather than dealing with a feast-or-famine situation where thirty heads of lettuce all mature on the same Tuesday.
Thinning seedlings is a task most beginners are reluctant to do because it feels like killing plants. But leaving seedlings overcrowded stunts every plant in the group. If carrots are sown thickly, thin them to two to three inches apart once they reach an inch tall. Yes, it hurts a little. No, you do not need to apologize to the carrots.
Knowing when to harvest vegetables makes a huge quality difference. Zucchini picked at six to eight inches is tender and flavorful. Zucchini discovered hiding under a leaf at the size of a baseball bat is watery and tasteless. Regular harvesting — every two to three days for fast-growing summer crops — signals the plant to keep producing.
Want to know how much your bed is likely to produce before the season ends? The Harvest Yield Estimator gives you projected harvest weight and days to maturity by crop so you can plan your kitchen around what is coming. A tomato left unpicked past peak ripeness slows down the next round of fruit set on that same plant.
Crop rotation is a practice worth building into your plan from day one. Planting the same vegetable family in the same spot year after year depletes specific soil nutrients and allows soil-borne diseases to accumulate over time. A simple four-bed rotation system cycles through legumes, leafy greens, fruiting vegetables, and root vegetables year by year, keeping your soil healthy and your garden productive for many seasons to come.
What About Garlic and Perennial Vegetables?
Garlic deserves a special mention because it operates on a completely different schedule from everything else in the garden. You plant it in October or November, it winters over in the ground, and you harvest it the following June or July. It is remarkably hands-off and deeply rewarding. Hardneck varieties like Rocambole and Purple Stripe are exceptional for flavor. Softneck types store longer and work well if you are in Zone 7 or warmer.
If you are thinking long-term, some perennial vegetables come back every year without replanting. Asparagus takes two to three years to produce its first real harvest, but a well-established asparagus bed can produce abundantly for twenty years or more. Rhubarb, artichokes in warmer zones, and Egyptian walking onions are other perennials worth carving out a permanent corner for in your garden design.
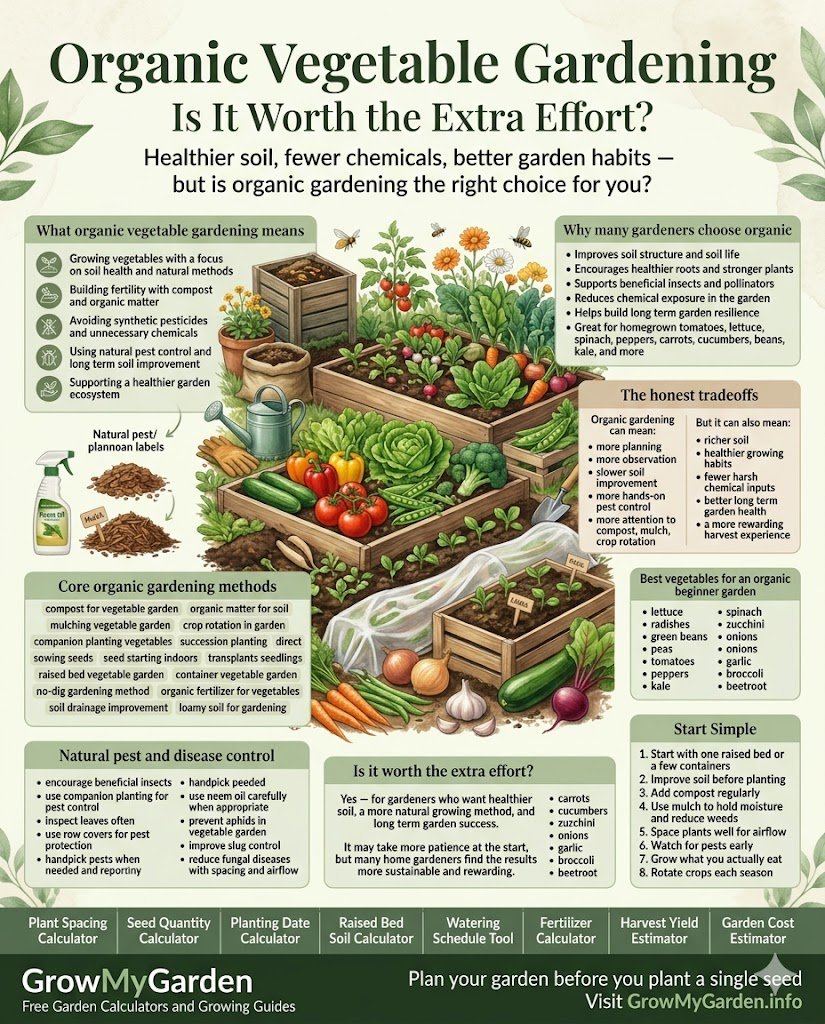
Organic Vegetable Gardening: Is It Worth the Extra Effort?
Organic gardening does not mean avoiding all inputs — it means choosing inputs that work with the soil’s biology rather than against it. For a home vegetable garden, the organic approach is honestly not that much more effort than conventional gardening, and the results in soil health over time are noticeably better.
Use compost as your primary soil amendment. Choose certified organic fertilizers when you supplement. Control pests with physical barriers and biological controls first, and use neem oil or insecticidal soap when you need a spray. Avoid systemic pesticides entirely, especially on flowering plants where pollinators are active.
The bonus is that when you sit down to eat a tomato still warm from the vine and you know exactly what went into growing it, the satisfaction is something you cannot replicate at any grocery store, organic or otherwise.
📱 Helpful Apps for Beginner Gardeners
Gardenate generates personalized planting calendars based on your location. iNaturalist helps identify mystery insects and plants. Planta offers watering reminders and plant care schedules. The Old Farmer’s Almanac website has a free frost date tool that is particularly reliable for US gardeners planning their spring and fall planting windows.
A Note on Patience and Realistic Expectations
Your first garden will not be perfect. Mine certainly was not. There will be a plant that mysteriously collapses overnight, a pest you cannot identify, and a week where you forget to water and come back to wilted lettuce. This is normal. Every experienced gardener has a mental catalog of failures that would fill a book, and those failures are the education that makes the successes possible.
What experienced gardeners know — and what beginners learn quickly — is that the garden is more forgiving than it looks. Plants want to grow. With reasonable sunlight, decent soil, and consistent water, most vegetables will reward you. Give yourself permission to make mistakes in season one. You will know so much more by the time you plan season two.
The goal is not a magazine-ready garden by July. The goal is food on your table that you grew yourself, some hard-won knowledge earned through hands-on experience, and the quiet satisfaction of a Sunday morning spent outside with your hands in the soil. That combination, honestly, is hard to beat. If you are wondering whether the investment pays off, the Garden Cost Estimator compares your setup and supply costs against the grocery value of what you grow.
Frequently Asked Questions
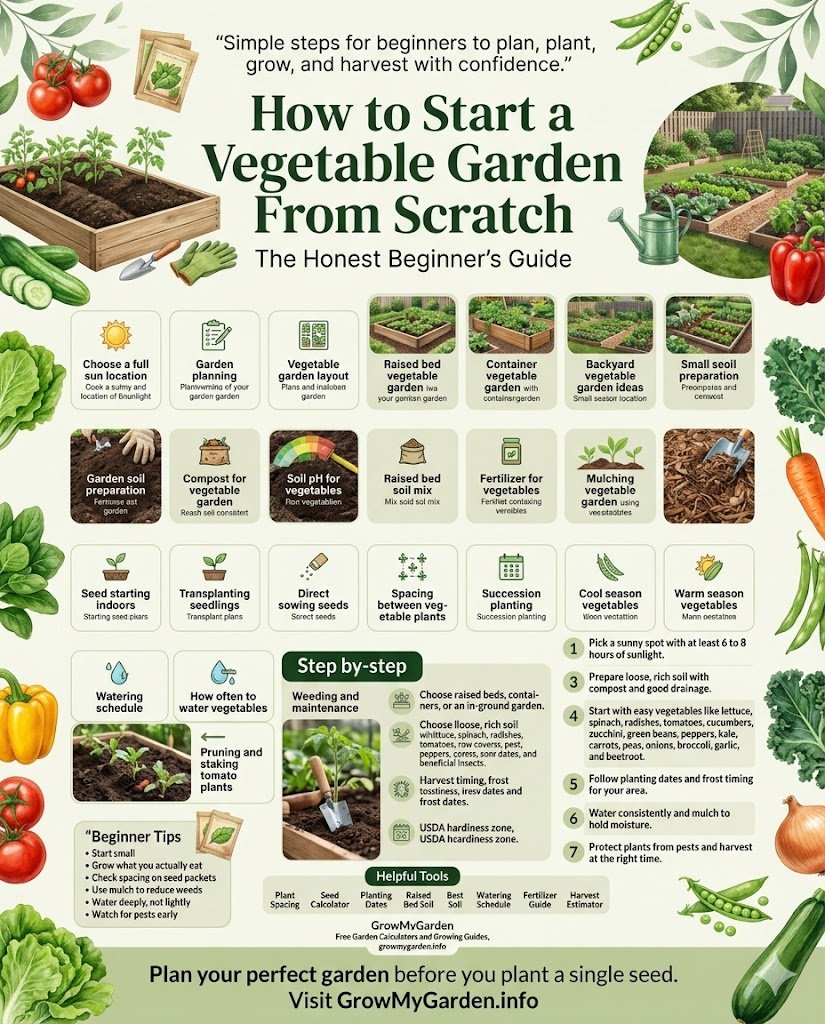
How do I start my first vegetable garden? Pick a sunny spot, loosen the soil, mix in compost, and plant easy vegetables like lettuce, radishes, or green beans. Water consistently and you are growing.
What is the most common mistake of first time gardeners? Planting too much too soon, then ignoring sunlight and spacing requirements. Crowded plants in bad light almost never thrive.
Which plant will grow in 7 days? No vegetable fully grows in 7 days, but radish and lettuce seeds will sprout and show visible seedlings within 5 to 7 days of planting.
What vegetables can grow in 30 days?Radishes (22 to 30 days), baby spinach, arugula, and microgreens are your best options for a harvest within a month.
Which vegetables grow quickly? The fastest growing vegetables are radishes, lettuce, spinach, arugula, green onions, kale, and zucchini. Radishes are the undisputed speed champions of the vegetable garden.

Leave a Comment