
How to Grow Tomatoes in Pots: A Real Gardener’s Guide That Actually Works
Growing tomatoes in pots is one of the easiest ways to enjoy fresh, homegrown flavor, even if you only have a balcony, patio, or small sunny corner. The good news is you do not need a huge garden to grow healthy, productive tomato plants. With the right container gardening setup, good soil, steady watering, and enough sunlight, tomatoes can thrive beautifully in pots. This guide walks you through what actually works in real life, from choosing the best tomato varieties to avoiding common mistakes like poor drainage and weak support. Whether you are a beginner or improving your potted tomatoes, you will find simple, practical steps here.
Now? I grow more tomatoes on my apartment balcony garden in Columbus, Ohio than some of my neighbors do in full raised beds. It took me a couple of seasons to figure out what actually works, and this guide is everything I wish someone had told me before I wasted that first summer. Whether you are working with a sunny balcony, a small porch, or a concrete patio, these tips will set you up for real success. Read our complete Vegetable Gardening guide.
Why Container Tomatoes Are Totally Worth It
A lot of gardening content treats container tomatoes like a consolation prize for people who do not have a yard. That framing is just plain wrong. Growing tomatoes in pots gives you real advantages: you control the soil completely, you can move plants to chase the sun, and you sidestep a lot of soil-borne diseases that plague in-ground gardeners year after year.
My neighbor Linda has a massive backyard but has battled early blight in her garden beds for five straight years. I have not had a single blight issue in three seasons of container growing because I start with fresh potting mix every spring. That is not luck. That is the container advantage working exactly as it should.
Step 1: Choose the Right Tomato Variety (This One Decision Changes Everything)
The most common mistake new container gardeners make is grabbing whatever tomato seedling looks healthy at the hardware store without checking whether it is actually suited for pot life.
Indeterminate varieties like Big Boy or Beefmaster keep growing all season long. They can hit six, seven, even eight feet tall. In the ground, that is glorious. In a patio planter on a deck, it becomes a structural nightmare and a daily watering chore that will wear you out fast.
For pots and planters, focus on these categories:
Determinate or Compact Varieties stop growing at a set height and ripen most of their fruit in a concentrated window. Patio tomatoes, bush tomatoes like Bush Early Girl, and compact types like Tumbling Tom Red were practically engineered for container life. Most of these reach full maturity and start producing in about 65 to 70 days from transplant, which is ideal if your growing season is on the shorter side.
Cherry tomato varieties are probably the single easiest win for container growers. Sweet 100, Sun Gold, and Black Cherry all thrive in pots, pump out fruit from July straight through fall frost, and handle the summer heat better than most large-fruited types. If you have never grown tomatoes in containers before, a cherry tomato is where I would tell you to start.
Celebrity is one of my personal favorites for larger containers. It tops out around four feet, resists most major tomato diseases, and produces consistently large, flavorful fruit all through summer. I grew four Celebrity plants in 15-gallon containers last summer and harvested over 30 pounds of tomatoes total. For a balcony garden, that is genuinely impressive output.
If you are determined to grow a bigger slicer variety like Cherokee Purple, go for it, but be ready to size up your container significantly and commit to a serious support system.
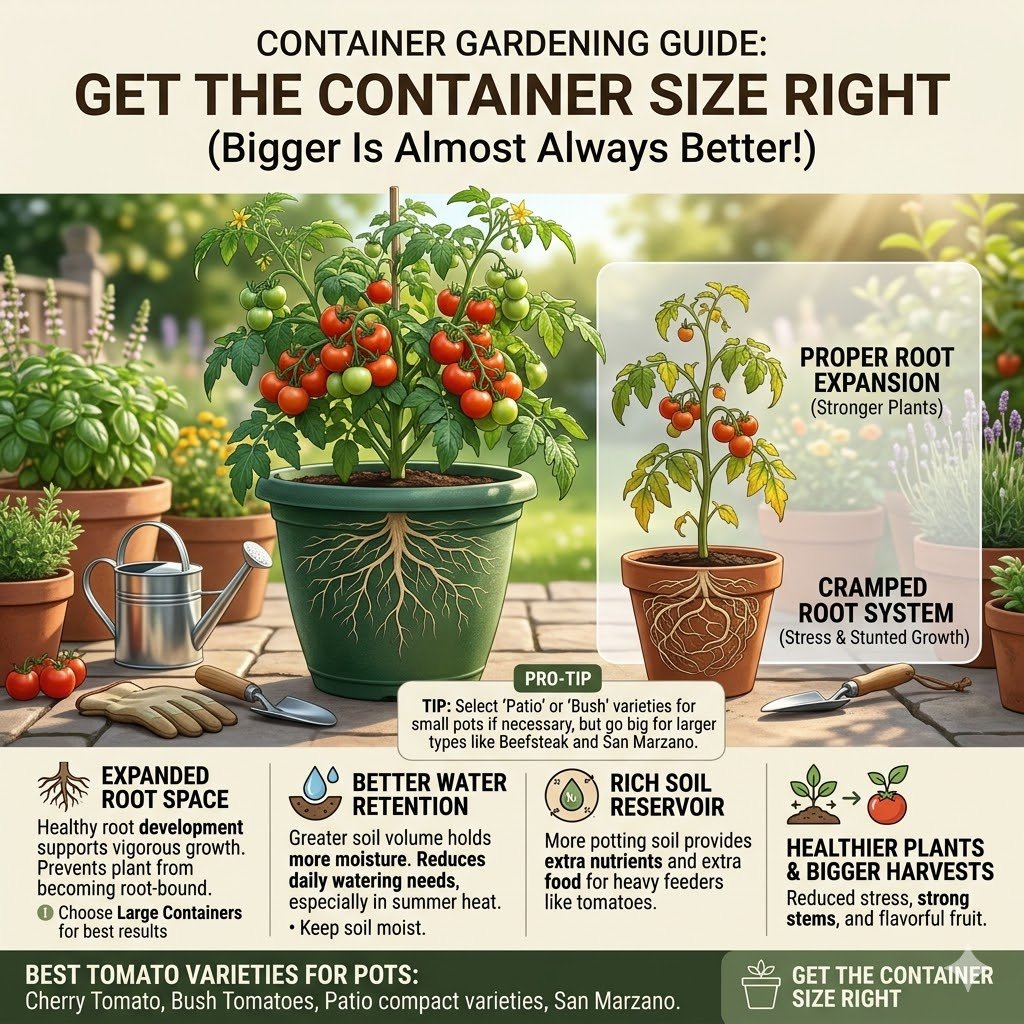
Step 2: Get the Container Size Right (Bigger Is Almost Always Better)
Here is the rule I follow now: when in doubt, go larger.
A 5-gallon container is the absolute minimum for a small bush tomato or cherry tomato plant. For anything medium-sized, a 10 to 15-gallon container is the sweet spot. For larger indeterminate tomato plants, you really want 20 gallons or more to give the root system enough room to fully support a mature tomato plant through the long heat of summer.
I use fabric grow bags almost exclusively now. Brands like VIVOSUN and Bootstrap Farmer make affordable felt grow bags in 10, 15, and 20-gallon sizes. The fabric allows air pruning of roots, which prevents the root-circling problem you see in standard plastic pots. My Celebrity plants in 15-gallon fabric bags consistently outperform the same variety I once tried in 12-inch plastic containers. The difference in root system health is clearly visible when you pull the plant at end of season.
If you are gardening on a patio or balcony with limited space, a self-watering tomato planter is genuinely worth considering. The Earthbox Original is the classic option, but there are plenty of less expensive self-watering tomato planters on Amazon that use the same sub-irrigation design. The reservoir keeps moisture levels far more consistent than hand watering alone, which directly reduces blossom end rot and split fruit. I added two of them to my balcony garden setup last season and the results were noticeably better than my standard fabric bags.
Avoid glazed ceramic pots unless drainage is excellent. I learned this painfully with a beautiful terra cotta-look ceramic planter that had only one small drainage hole. Root rot crept in by August and I lost the whole plant.
Whatever container, planter, or grow bag you choose, multiple drainage holes at the bottom are non-negotiable.
Step 3: Soil Mix Matters More Than Almost Anything Else
Do not use garden soil in containers. Ever. It compacts quickly, drains poorly, and brings in pests and pathogens that will make your season miserable.
My go-to potting mix for tomatoes in pots:
- 60% high-quality potting mix (Fox Farm Ocean Forest or Espoma Organic Potting Mix are both excellent choices)
- 20% compost (homemade is best, but Bumper Crop or Black Gold bagged compost works well)
- 10% perlite to improve drainage and keep the root zone properly aerated
- 10% coco coir for moisture retention between watering sessions
Not sure how much potting mix, compost, and perlite to actually buy? Our Raised Bed Soil Calculator works for containers and pots too — enter your dimensions and it tells you exactly how many bags you need.
This combination holds water long enough to buffer a scorching summer afternoon but drains fast enough to prevent soggy, oxygen-starved roots. It also provides a steady nutrition base that supports strong early growth from the moment a tomato seedling goes into the planter.
Mix in a slow-release balanced fertilizer like Osmocote Plus at planting time. This gives the plant a consistent nutrient drip for the first couple of months while you get your watering routine dialed in.
One addition I have started making: a one to two inch layer of mulch on top of the potting mix. This sounds like something only in-ground gardeners need to worry about, but mulch on container tomatoes does two genuinely useful things. It slows surface moisture evaporation during heat waves and keeps the potting soil temperature more stable on those brutal July afternoons when a black plastic container sitting in full sun can get hot enough to damage roots near the surface. Straw, shredded leaves, or untreated grass clippings all work fine as mulch in pots.
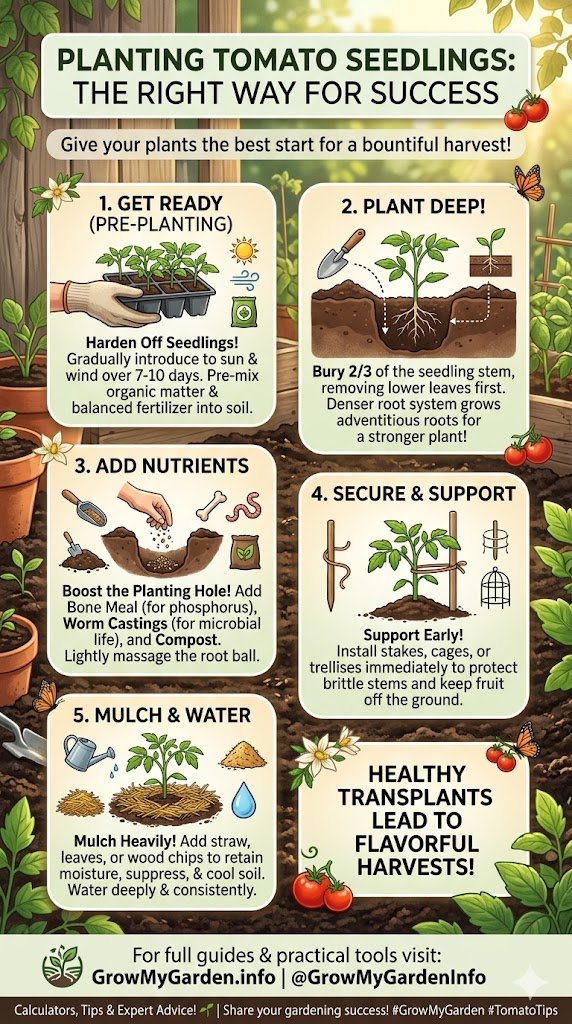
Step 4: Planting Your Tomato Seedling the Right Way
Tomatoes are one of the few vegetables that actively reward being buried deep. When you plant deeply, the buried section of stem develops into roots along its length, building out a stronger, more extensive root system and a far more drought-tolerant plant overall.
When I transplant a tomato seedling, I remove the lower leaves and bury the stem right up to the first set of healthy remaining leaves. For a seedling coming out of a standard 4-inch nursery cell, that often means burying four to six inches of stem. The additional roots that develop along that buried stem are noticeably thicker and better established by midsummer compared to plants set in at their original soil line.
Timing for most of the United States falls around two weeks after the last frost date in your region. The Old Farmer’s Almanac has a free frost date tool, but if you want your full sowing, transplanting, and harvest timeline in one place, use our Planting Date Calculator — just enter your zone and crop.
In USDA zones 6 and 7, that usually means early to mid-May. Nighttime temperatures should be holding consistently above 50°F before any tomato seedling stays outside permanently. Tomato plants exposed to sustained cold below that threshold stall out, and a stalled young plant can take weeks to recover. The Old Farmer’s Almanac website has a free frost date lookup tool where you type in your zip code and get your specific planting window. I use it every spring without fail.
Place your container where it will receive at least eight hours of direct sun per day. South-facing patios and walls are goldmines for container tomatoes. The reflected heat from brick or stucco actually extends your growing season on both ends and pushes fruit development faster during cool spring spells.
Step 5: Watering Without Driving Yourself Crazy
Tomatoes in pots are extremely thirsty. There is no dancing around this. A mature tomato plant in a 15-gallon bag on a hot July day in Georgia or Texas can easily need a full gallon of water or more daily.
I check moisture every morning by pressing my finger two inches into the potting soil. If it feels dry at that depth, it is time to water. If it is still damp, I check again in the afternoon before the evening cool-down sets in. If you want to remove the guesswork entirely, our Watering Schedule Tool calculates weekly water needs based on your crop, container size, and climate.
Inconsistent watering is the number one trigger for blossom end rot, the frustrating condition where the bottom of your tomatoes turns black and leathery. It is not a disease. It is a calcium absorption failure caused by irregular moisture around the root system. I dealt with this badly in my second season before I made the connection between my erratic schedule and the damaged fruit piling up in my harvest basket.
For anyone who travels or keeps a hectic schedule, a drip irrigation setup connected to a simple timer is a genuine game-changer. I use a Rain Bird 1ZEHTMR timer linked to adjustable drip emitters, one per container. The whole irrigation setup costs around $60, runs automatically twice a day during peak summer heat, and has essentially eliminated blossom end rot from my containers since installation. If a self-watering tomato planter is not in your budget, automated drip irrigation is the next best thing for keeping moisture levels consistent.
Step 6: Feeding Your Tomato Plants Through the Season
Container tomatoes need regular feeding because nutrients flush out of potting soil with every watering. In-ground tomato plants can draw minerals from surrounding soil for weeks. Your pots simply cannot do that.
Early in the season, a balanced fertilizer with roughly equal nitrogen, phosphorus, and potassium numbers supports healthy stem growth and root system development without pushing too much leafy top growth at the expense of everything else.
Once the plant starts flowering, the nutritional focus needs to shift. At the flowering stage, you want a high potassium fertilizer that supports fruit set, cell wall development, and that deep, rich flavor you are after. Fox Farm Tiger Bloom is what I reach for at this point in the season. I feed every ten days once I see the first flower clusters forming and opening.
Fish emulsion is another option I have used with genuinely good results, particularly in the early to mid-season when I want to give tomato plants a gentle organic nitrogen boost without the risk of burning roots. Neptune’s Harvest Fish and Seaweed fertilizer has a smell that is best experienced strictly outdoors (fair warning to anyone gardening on a balcony near an open window), but tomato plants respond to it with noticeably vigorous growth. I alternate between fish emulsion early in the season and a high potassium fertilizer once flowering begins. That two-phase feeding approach has produced consistently flavorful fruit season after season.
Overfeeding is just as real a problem as underfeeding. If your plant looks lush and intensely dark green but is producing almost no fruit by mid-July, excess nitrogen is almost certainly the reason.
Calcium and magnesium are worth supplementing separately in containers because regular watering flushes both out of potting soil over time. A foliar spray of diluted Cal-Mag solution every two to three weeks throughout summer keeps deficiency symptoms from sneaking up on you. I use General Hydroponics CALiMAGic for this and it has made a measurable difference in both fruit quality and plant longevity into fall.
Step 7: Supporting Your Plants for the Long Season Ahead
Even compact patio tomatoes and bush tomatoes need some structural support once fruit starts setting. A mature tomato plant loaded with developing fruit is heavier than it looks and will fold sideways onto itself without help.
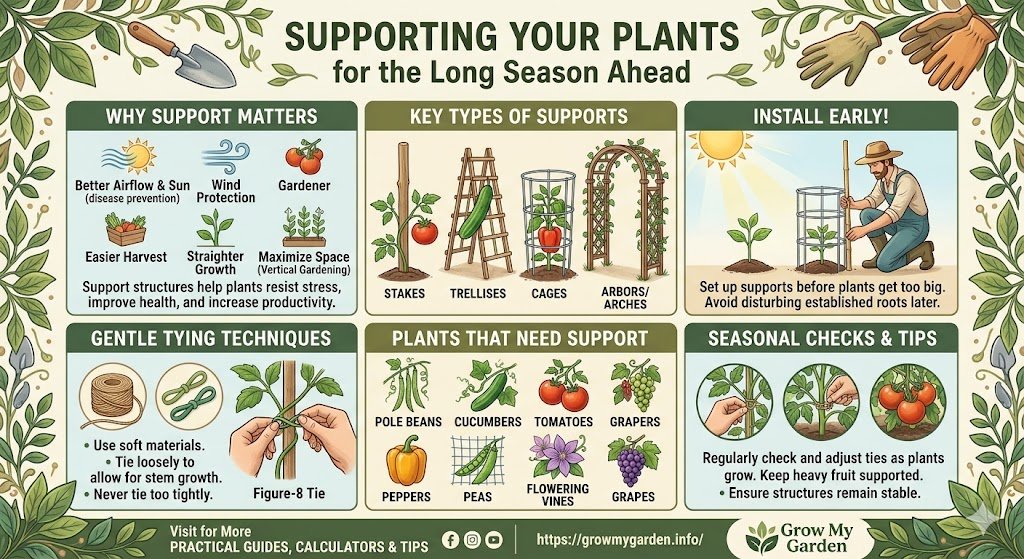
For smaller cherry tomato varieties and bush tomatoes in standard containers, a simple wire cage pushed into the potting mix at planting time is usually all the support needed. For anything approaching four feet or taller, I use 6-foot bamboo stakes and soft garden velcro ties on the main stem. Avoid wire ties or rough twine that can cut into the stem as the plant thickens through the heat of summer.
For larger indeterminate plants in big containers, the Florida Weave method works beautifully. You run garden twine horizontally between two bamboo stakes on either side of the plant and weave it loosely around the stems as the plant climbs higher. By August it looks like a proper trellis system and keeps everything vertical without the constant fuss of individual stake-and-tie management on every branch.
Common Mistakes That Are Completely Avoidable
Planting too early. Cold potting soil stresses tomatoes and stunts root system development even when daytime temperatures feel warm. Wait until nighttime temperatures are consistently holding above 50°F before any tomato seedling goes out for good.
Skipping hardening off. Transplants raised indoors or purchased from a greenhouse need gradual exposure to outdoor temperatures over seven to ten days before permanent planting. Moving a seedling straight from a climate-controlled space into full summer heat and direct sun is a shock the plant can take weeks to bounce back from.
Reusing old potting soil. Last season’s potting mix is compacted, stripped of nutrients, and potentially harboring pathogens from whatever grew in it before. Fresh potting mix runs about $15 to $20 per large bag and is one of the highest-return investments in container gardening.
Ignoring suckers on indeterminate varieties. The small shoots growing in the crotch between the main stem and a side branch will become full-size stems if left alone. Pinch them off while still small, around one inch long, and the plant routes its energy into producing flavorful fruit instead of expanding into an unmanageable green tangle. Read our complete Pest Control and Plant Health guide
When Things Go Wrong Mid-Season
Yellow leaves on the lower sections of a mature tomato plant are almost always a normal part of seasonal progression. The plant sheds older foliage naturally as it directs energy upward toward developing fruit. Do not panic and start stripping leaves.
Yellow leaves moving upward rapidly, especially with brown spotting or unusual patterns, usually point to a nutrient issue or disease. Take a sharp photo and run it through the iNaturalist app or use the PlantID feature in the Greg Plant Care app. Both tools are surprisingly accurate at diagnosing tomato problems from a good photo, which saves a lot of guesswork and wasted fertilizer.
Leaf curling during afternoon heat is typically a stress response to high temperatures, not a disease signal. If the leaves relax and uncurl overnight, the plant is managing fine. Persistent curling that does not recover by morning points to a root zone problem worth investigating, usually either overwatering or severe dryness between irrigation sessions.
Harvesting Flavorful Fruit and Wrapping Up the Season
Most compact container varieties, including the majority of cherry tomato types and patio tomatoes, hit their first harvest window at roughly 65 to 70 days after transplanting. Mark your calendar at planting time and you will not be caught off guard when fruit suddenly appears in quantity all at once.
Tomatoes are ready to pick when they yield slightly to gentle pressure and show full, even color throughout. Picking them at full color and letting them finish softening on a countertop is perfectly fine and often results in more flavorful fruit than leaving them to go fully soft on the vine during the heat of a late summer afternoon.
Never refrigerate fresh tomatoes. Cold temperatures break down the aromatic compounds responsible for that deep, complex summery flavor that makes growing your own worth every watering session and every handful of fertilizer. A bowl on the countertop at room temperature is exactly where homegrown tomatoes belong until you eat them.
After the first frost ends the season, I dump the spent potting soil into my compost pile, scrub the containers and planters with a diluted bleach solution to clear out any lingering pathogens, and store everything dry until spring. That simple end-of-season routine takes about an hour and sets the stage for another strong year ahead.
If you are weighing whether container tomatoes are actually worth it financially, run your setup through the Garden Cost Estimator to see how your costs stack up against grocery savings over a season.
There is something genuinely satisfying about slicing into a tomato you grew yourself in a patio planter or balcony garden setup. It tastes different from anything at a grocery store, not just because homegrown varieties tend to produce more flavorful fruit than commercial types bred for shelf life, but because you paid close attention to something across an entire season and watched it deliver. That feeling honestly does not get old, no matter how many summers you do this.
Frequently Asked Questions
How do you look after tomato plants in pots?
Use a large pot with good drainage, fill it with quality potting mix, water consistently, feed regularly with tomato fertilizer, add support, mulch the soil, and place the plant in full sun.
What do coffee grounds do for tomatoes?
Coffee grounds add small amounts of nitrogen and organic matter to the soil. Use them lightly or compost them first, because too much can compact soil or affect drainage.
What not to do when growing tomatoes?
Do not use tiny pots, heavy garden soil, poor drainage, irregular watering, too much nitrogen fertilizer, overcrowding, or leave plants unsupported.
Why should you sprinkle baking soda around your tomato plants?
Some gardeners believe baking soda helps reduce soil acidity or make tomatoes sweeter, but this is mostly a gardening myth. Use it carefully, as too much baking soda can harm soil and plants.
What does Epsom salt do for tomato plants?
Epsom salt provides magnesium, which can help if the plant has a magnesium deficiency. It is not needed for every tomato plant, so use it only when symptoms or a soil test suggest a need.

Leave a Comment