
How to Grow Avocado From Seed Indoors (Pit to Plant, Step by Step)
There is something deeply satisfying about pulling a pit from your kitchen trash, dropping it in a glass of water, and watching it slowly crack open into a living plant. Growing an avocado from seed indoors is one of those rare gardening projects that costs almost nothing but pays back in pure curiosity and greenery. The plant itself — Persea americana — is a stunning tropical houseplant with bold, glossy leaves that can reach ceiling height over time.
Whether you are dabbling in kitchen scrap gardening or just looking for a rewarding beginner project, this guide walks you through everything: avocado pit germination, potting, light needs, and keeping your seedling alive long-term. No greenhouse required — just a windowsill and some patience.
No greenhouse required — just a windowsill and some patience. Curious how much you could save growing your own food versus buying it? Run your numbers through the Garden Cost Estimator. It compares your gardening spend against estimated grocery savings.
I have been doing this for a few years now out of my apartment in Chicago, and I want to be upfront with you right from the start: this is a long game. Avocado pit sprouting time is measured in weeks. Tree maturity is measured in years. And if you are chasing homegrown guacamole, an avocado tree grown from seed takes anywhere from five to thirteen years to fruit, and even then it almost always needs a second tree for pollination and proper outdoor conditions. A seed-grown tree is genetically different from its parent, so what you get is never guaranteed to match the avocado you started with.
But here is the thing — none of that should stop you. As an indoor avocado tree, as a striking tropical houseplant, as a kitchen scrap gardening project that doubles as a beginner lesson in plant biology, this is one of the most rewarding slow-burn hobbies I know. The avocado, botanically known as Persea americana, is a genuinely beautiful indoor plant with large, glossy leaves and surprising growth speed once it settles in. Whether you live in a studio apartment or a suburban home, urban indoor gardening does not get much more satisfying than watching a grocery store pit transform into a two-foot tree. Read our Fruit Gardening guide.
What to Realistically Expect: Timeline and Fruit-Bearing Truth
Before you start, let us get the timeline straight so nothing catches you off guard.
Germination (pit to first root and shoot): two to eight weeks, sometimes longer. Pot to stable seedling: another four to six weeks. A year in, your avocado plant height indoors will typically be between one and three feet depending on your light conditions and care. Avocado growth rate is genuinely impressive once the roots establish, but the early stage is slow and tests your faith.
On the question of fruit — the avocado seed vs grafted tree comparison is worth knowing. Commercially sold avocados come from grafted trees, meaning the fruiting variety is spliced onto hardy rootstock. A seed-grown plant carries no such guarantee. You are essentially growing a new genetic individual. You might get an ornamental avocado plant that never fruits indoors, or you might, years down the road, get lucky. Most people growing avocados from seed in US homes treat them as what they truly are: gorgeous tropical houseplants. That framing makes the whole experience far more enjoyable.
Choosing and Preparing the Avocado Seed
Start with a ripe avocado. The Hass avocado is the most common grocery store variety in the US and works perfectly for this. If you can find a Fuerte avocado, the larger, smoother-skinned variety, those pits also sprout reliably and tend to be slightly bigger, which some people find easier to work with.
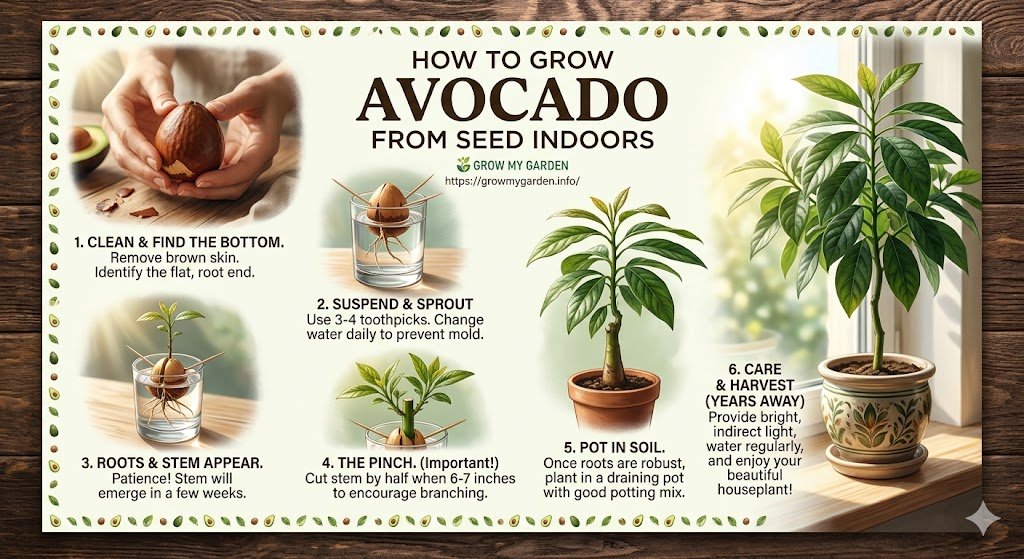
After scooping out the flesh (enjoy your toast or guacamole), rinse the pit gently under lukewarm water. Do not scrub. There is a thin, papery skin coating the outside of the seed — this is the seed coat. Peeling it off can actually speed up germination, because it lets moisture reach the seed interior faster. If it comes away easily, remove it. If it clings, leave it.
Now, pay attention to avocado seed orientation, because getting this wrong is the single most common mistake beginners make. The pit has two distinct ends: a slightly pointy top and a flatter, rounder bottom. The flat end goes into the water. The pointy end faces up. The avocado taproot will emerge from the bottom, and the stem will push up from the top. Reversing this produces nothing but frustration.
Germination Methods: Toothpick Water Method vs. Soil Germination Method
There are two reliable ways to germinate an avocado seed, and they each have loyal fans. Here is how both work.
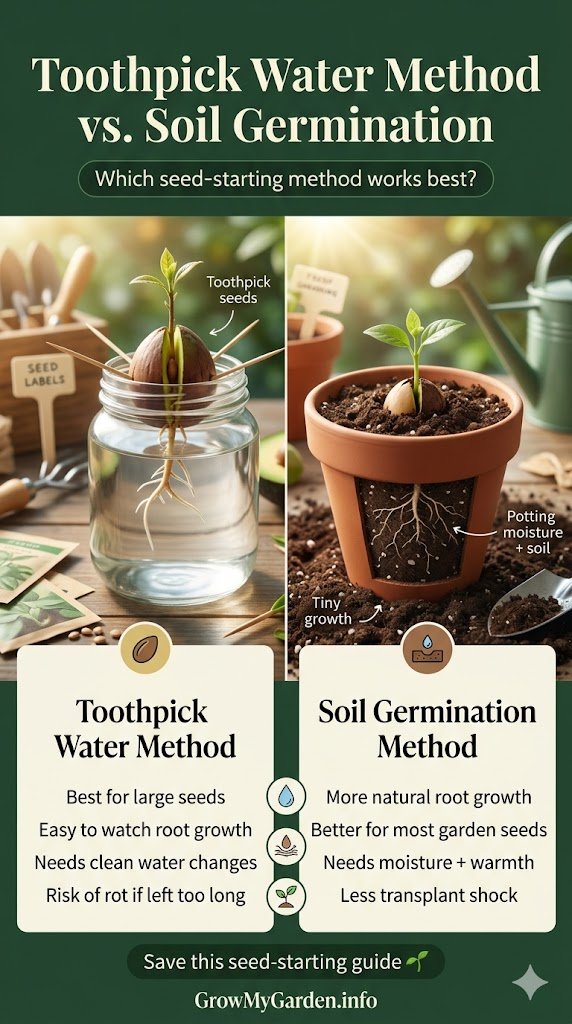
The Toothpick Water Glass Method (Traditional Approach)
This is the classic. The toothpick germination method is popular because it lets you watch every stage of avocado pit germination unfold through the glass — which is genuinely exciting.
Take four toothpicks (not three — four gives better stability) and push them into the pit at a slight downward angle, evenly spaced around the widest midpoint of the seed. The downward angle matters: it lets the bottom third of the pit sit submerged in water while the top stays dry and exposed to air.
Set it over a clear glass or wide-mouthed mason jar filled with lukewarm water. A clear container matters because you want to monitor the avocado taproot as it develops and catch any signs of trouble early. Refresh the water every two to three days without fail. Stagnant water breeds mold faster than you would think, and avocado seed molding in water is one of the most common reasons this project fails in the first few weeks.
Keep the glass somewhere warm — ideally between 65 and 85 degrees Fahrenheit. A kitchen counter away from cold windows works well. Avoid air conditioning vents.
The first sign of life is an avocado seed cracking right down the middle. Then the taproot pushes out from the bottom, pale and almost alien-looking. Eventually a reddish shoot emerges from the top. This is your cue to get ready for the next step. Wait until the taproot is at least two to three inches long and the stem has made an appearance before moving to soil.
The Soil Germination Method (Faster, Less Visual)
The lesser-known alternative is direct soil germination, and honestly, it works just as well — sometimes better. The advantage is that the seedling never has to make the stressful jump from water to soil, which can cause a brief transplant shock.
To use this method, peel the seed coat from the pit, then bury the pit in a small pot of moist, well-draining potting mix with just the top third poking above the surface. Keep the soil consistently damp but not waterlogged, and place it in a warm spot. The downside is you cannot see what is happening underground, so you are working on faith for the first few weeks. But many experienced growers prefer it for exactly that reason — it mimics natural conditions more closely.
Either method will get you to a sprouted seedling. Pick whichever suits your personality. If you love watching the process unfold, go with the water glass method. If you are more of a set-it-and-forget-it gardener, the soil germination method is your friend.
When and How to Pot the Seedling
This is where a lot of people rush — and pay for it later. Transplanting too early, before the roots are strong enough, leads to a stressed seedling that stalls or collapses.
When Should You Transfer an Avocado Seed to Soil?
If you used the toothpick water method, wait until the taproot is a firm two to four inches long and the stem has sprouted and begun leafing out. Rushing the seedling to soil before the root system is established almost always results in a plant that struggles to anchor itself.
What Type of Soil Does an Avocado Plant Need Indoors?
Avocados despise sitting in wet soil. The best soil for avocado indoors is a well-draining potting mix with added perlite — roughly 70 percent potting soil to 30 percent perlite is a combination that has worked consistently well for me. A peat-free potting mix is worth seeking out if you care about sustainability; coco coir-based mixes drain beautifully and are a solid zero waste gardening choice.
Avoid heavy garden soil or any mix labeled for moisture retention. Those are the enemy of avocado roots.
Terracotta vs Plastic Pot for Avocado
Avocado container gardening works with either material, but there is a difference worth knowing. Terracotta pots are porous, which means they breathe and dry out faster — great for preventing overwatering, but they need more frequent checks in summer. Plastic pots hold moisture longer, which is convenient but requires you to be more disciplined about not watering too often. For beginners who tend to overwater (most of us do), terracotta pots are the safer choice.
For avocado pot size, start with a six to eight inch pot. Do not go too large — excess soil volume holds moisture around the roots longer than necessary, which is a direct path to root rot.
When you transplant, make a hole in the center of the soil and nestle the pit in so the top half remains above the soil line. The pit is still acting as a nutrient source for the young plant. Burying it entirely cuts off that energy supply and invites rot. After planting, water thoroughly until it drains freely from the drainage holes at the bottom. Those drainage holes are non-negotiable — no drainage holes means waterlogged roots, and waterlogged roots means a dead plant.
Light, Temperature, and Humidity: Getting the Environment Right
How Much Light Does an Indoor Avocado Need?
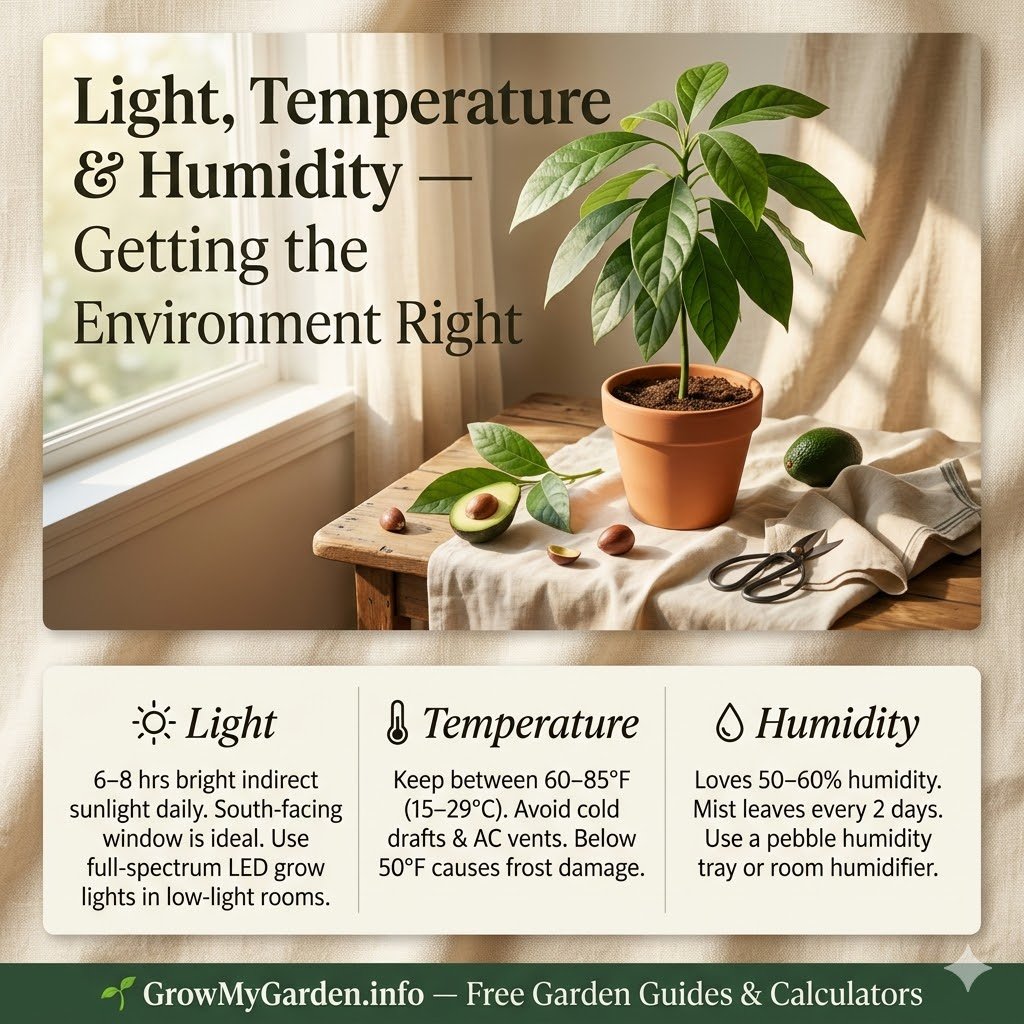
Avocados are tropical plants. They want light, lots of it, and they make no apologies for that. A south-facing window is the ideal placement in the US — it delivers the most consistent hours of direct sunlight throughout the year. A west-facing window is a decent second choice, catching strong afternoon light.
If your home does not have good natural light (many apartments in northern cities like Minneapolis or Seattle deal with this in winter), an LED grow light on a 12 to 14 hour daily timer makes a meaningful difference. I use a Soltech Solutions Vita grow bulb in a floor lamp near my plants from November through March, and the growth rate and leaf color during those months is noticeably better than when I tried to make do with natural winter light alone. Other solid brands include Barrina and GE BR30 grow bulbs, which screw into any standard lamp socket — no special equipment needed.
The avocado brightness target is at least six hours of bright indirect light daily, and more direct sun is welcome as long as you introduce it gradually.
Temperature and Cold Sensitivity
Keep your indoor avocado tree between 60 and 85 degrees Fahrenheit. Avocado frost sensitivity is extreme — even a brief dip below 50 degrees Fahrenheit can cause significant cold damage, browning leaves, and sometimes death in young plants. Keep avocados away from drafty windows in winter, and never place them near an air conditioning unit in summer.
If you live in USDA hardiness zones 9 to 11 (Southern California, South Texas, South Florida), you can move your potted avocado outdoors year-round. Everyone else should treat it strictly as an indoor plant that gets a summer vacation outside when nighttime temperatures stay reliably above 55 degrees.
If you live in USDA hardiness zones 9 to 11, you can move your potted avocado outdoors year-round. Everyone else should treat it strictly as an indoor plant that gets a summer vacation outside when night time temperatures stay reliably above 55 degrees. Not sure when that window opens in your area? The Planting Date Calculator factors in your climate zone and gives you sowing, transplanting, and seasonal timing — useful for planning that outdoor move.
Humidity: The Underrated Factor
Avocado humidity requirements are higher than what most American homes naturally provide, especially during winter when heating systems strip the air dry. The minimum is around 40 to 50 percent relative humidity. Below that, you will see the leaf tips turning brown and crispy — not from underwatering, but from dry air.
Running a small humidifier near your plants from fall through spring is the most effective fix. Misting avocado leaves a few times a week helps too, though it is more of a supplement than a solution. A humidity tray — a shallow tray filled with pebbles and water set under the pot — adds gentle ambient moisture as the water evaporates. Use all three together if your home gets particularly dry in winter.
Watering Schedule and Fertilizing: Feeding the Tree Right
How Often Should You Water an Indoor Avocado?
The single most common mistake with avocado care indoors is overwatering. Avocado overwatering signs are easy to misread — yellowing leaves look like a nutrient problem but are usually a water problem. Before every watering, stick your finger an inch into the soil. If it still feels damp, walk away and check again in a day or two.
When you do water, water deeply. Deep watering avocado means soaking the soil thoroughly until water runs freely out the drainage holes, then allowing the top inch or two to dry before watering again. Shallow, frequent watering encourages shallow root development and keeps the soil surface constantly moist — perfect conditions for root rot and fungal issues.
Avocado watering schedule roughly breaks down like this: every seven to ten days in spring and summer, and every ten to fourteen days in fall and winter. Always let the plant — not the calendar — dictate timing. Want a more precise weekly water amount based on your specific setup? The Watering Schedule Tool calculates exactly how much water your plant needs each week so you stop second-guessing.
Avocado watering schedule roughly breaks down like this: every seven to ten days in spring and summer, and every ten to fourteen days in fall and winter when growth slows. Always let the plant, not the calendar, dictate timing. Soil moisture is a better guide than any schedule.
Avocado Root Rot Prevention
Root rot in avocados is caused by a combination of overwatering and poor drainage. It is almost always preventable. The symptoms are wilting or drooping leaves despite wet soil, a foul smell from the pot, and dark, mushy roots if you pull the plant out. By the time those symptoms appear, the rot is already advanced.
Prevention is simple: well-draining potting mix, a pot with drainage holes, a disciplined watering schedule, and checking the soil before every single watering session. That combination eliminates the conditions root rot needs to get started.
Fertilizing: What to Use and When
Avocados are moderate feeders — they want nutrition, but they do not need to be force-fed. A balanced NPK fertilizer, something in the 10-10-10 or 6-6-6 range, works well during the growing season. I alternate between a liquid fertilizer like Espoma Organic Grow! diluted to half strength every two weeks, and a slow-release fertilizer granule worked into the top of the soil every couple of months.
Stick to half-strength applications during spring and summer, and stop fertilizing entirely in fall and winter. If you want to remove all guesswork on dosage and bed size, the Fertilizer Calculator figures out exactly how much fertilizer your plant needs so you never over or underfeed.
Nitrogen fertilizer for avocados is particularly important for leaf development and overall color — nitrogen-deficient avocados develop pale, washed-out leaves. But more is not better. Too much nitrogen produces fast, weak, spindly growth. Stick to the half-strength approach during spring and summer, and stop fertilizing entirely in fall and winter when the plant is not actively growing.
Pruning for a Bushy, Full-Looking Plant
Left to grow on its own, an avocado seedling does what nature designed it to do: race toward the sky. In a forest, that makes sense. In your living room, the result is a single gangly stem with a few leaves at the top — not exactly a showpiece.
The pinch and prune technique is how you fix this. When your avocado stem reaches about ten to twelve inches tall, pinch off the growing tip — the very top set of leaves. This triggers node activation along the sides of the stem, encouraging the plant to send out lateral branches instead of continuing to grow straight up. The result, over a few months, is a bushy avocado plant with multiple branches and a much fuller silhouette.
When to prune avocado thereafter is simple: any time a branch gets leggy or outpaces the others, snip it back to a node (the small bump where a leaf joins the stem). Each cut encourages two new branches to form. You are essentially training the avocado plant shape branch by branch.
This is one of those moments in gardening where doing something that feels wrong — cutting healthy growth — produces a better outcome. Trust the process.
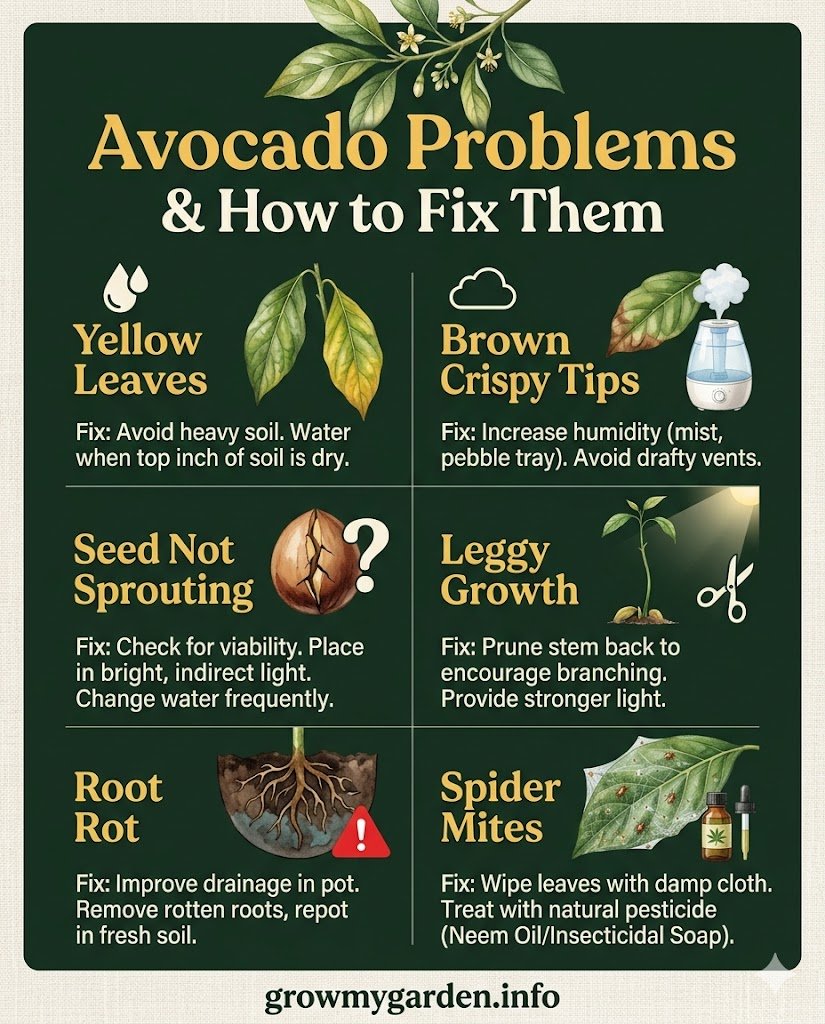
Troubleshooting: Common Avocado Problems and How to Fix Them
Why Is My Avocado Seed Not Sprouting in Water?
Failed avocado germination has a few common causes. The pit may be oriented incorrectly (flat end up instead of down). The water may not have been changed frequently enough, leading to mold. The temperature may be too cold — avocado seed germination stalls below 60 degrees Fahrenheit. Or the pit itself may have been taken from an avocado that was not fully ripe.
If your pit has been sitting in water for more than ten weeks with no sign of cracking, try starting fresh with a new pit. Germination rates with fresh pits from ripe fruit are significantly higher.
Avocado Leaves Turning Yellow
Yellow leaves are almost always a signal of overwatering. Check the soil — if it is soggy, let it dry out fully before watering again. If the yellowing is happening alongside very pale new growth, it could be a nitrogen deficiency, in which case a dose of diluted liquid fertilizer will help. But rule out overwatering first, because fertilizing a waterlogged plant just makes matters worse.
Avocado Leaves Turning Brown at the Tips
Crispy, brown-tipped leaves are the plant’s way of telling you the air is too dry, or occasionally that it is getting too much direct hot sun through glass in midsummer. Increase humidity, pull the pot back slightly from the window during peak summer heat, and check that no heating or cooling vent is blowing directly on the plant.
Avocado Leggy Growth and Drooping Stems
Avocado leggy growth — long, stretched internodes with widely spaced leaves and a stem that cannot quite support itself — is a light problem. Move the plant to a sunnier window or add a grow light. Leggy plants can recover once light levels improve, but the stretched growth will not compact; new growth will simply come in denser.
Spider Mites and Pests
Avocado pests indoors are less common than with many other houseplants, but spider mites are the main one to watch for. They thrive in dry conditions — which is another reason maintaining proper humidity pays off. Spider mites on avocado show up as fine webbing under the leaves and a dusty, speckled appearance on the leaf surface. Treat with insecticidal soap or a neem oil spray, applied weekly for three weeks to break the life cycle.
Frequently Asked Questions
How long does it take to grow an avocado from seed? From pit to first sprout is typically two to eight weeks. From sprout to a foot-tall seedling is another two to four months. A fully established indoor avocado tree in a large pot takes one to two years of consistent care. Patience really is the main ingredient here.
Which end of the avocado seed goes in water? The flat, rounded bottom end goes in the water. The slightly pointed top end stays above the waterline. Getting this orientation right is the single most important step in the entire germination process.
When should I transfer the avocado seed to soil? Once the taproot is at least two to three inches long and the stem has begun to emerge from the top of the pit. Do not rush it — a strong root before transplanting means a much more resilient seedling.
What type of soil does an avocado plant need indoors? A well-draining potting mix is essential. A blend of potting soil and perlite (roughly 70 to 30) is ideal. Avoid moisture-retaining mixes and never use dense garden soil.
Can an avocado tree grown from seed produce fruit? Yes, technically, but the realistic timeline is five to thirteen years, and the tree needs to be large, get consistent outdoor-level light, and usually has a second tree nearby for pollination. Most avocados grown from seed in American homes are grown as ornamental houseplants rather than for fruit production. If fruit is your actual goal, a grafted nursery tree will get you there far sooner.
Do I need two avocado trees for pollination? Avocado pollination indoors is tricky. Avocado trees have a quirky flowering pattern where male and female flower parts are open at different times of day. Two trees of different flowering types (Type A and Type B) improve the odds of pollination significantly. Hass is a Type A variety, and Fuerte is Type B — planting one of each is the traditional pairing for home growers who are serious about fruiting.
Why is my avocado seed not sprouting? The most common culprits are incorrect seed orientation, stagnant water that was not refreshed regularly, temperatures that are too cold, or simply a pit that was not ripe enough when taken from the fruit. Start with a fresh pit from a properly ripe avocado and make sure you are changing the water every two to three days in a warm spot.
A Few Final Thoughts
Growing an avocado from seed indoors is one of those beginner houseplant projects that looks simple on the surface but quietly teaches you a lot — about patience, about reading plant signals, about the difference between reacting to problems and preventing them. It is a genuine entry point into tropical indoor plant care, and once you have done it once, you will find yourself fishing pits out of the compost bin with a whole new sense of purpose.
It is also just one of the more charming examples of zero waste gardening: something that would have been discarded becomes, with a little effort and a glass of water, a living thing that might outlast the kitchen it started in. That feels worth something, regardless of whether it ever bears fruit.
Give your pit clean water, good warmth, and a bright window. The rest, it will mostly work out on its own.


Leave a Comment